
Fab Fabric storage cube Freshen Up!-
- Sep 9, 2015
- 4 min read
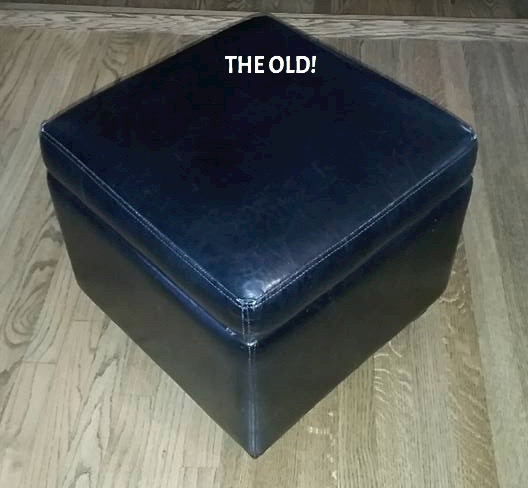
These cubes provide great storage for the family room, serve also as ottomans, extra casual seating and we've flipped the lids over to use them as coffee tables...problem is that the 'dust covered' flat surface doesn't look very nice and it's pretty dirty from little spills. My little TWEAK will solve that!
We've had them for quite awhile and well, they were just getting a bit tired on the corners, couple of seat scratches, also very dark and my room could use some perking up!
part one...
THE LID!
Gone with the Black Bi-Cast, enter Fab new look.
***for this method choose a heavy fabric that will cover the existing colour of the fabric on the box.
try....My first effort with the lid was to sew a square top in a yellow and white fabric...it turned out good, but didn't suit the fabric.
try...My second effort same fabric but sewn corner darts, fit nice...but again, deciding maybe that awesome fabric would be better elsewhere...
Again....Third try, heavier multicolour, very family room feeling fabric! get this...no sewing on this lid!
Tools used-some specific to this construction
a hex tool for the feet
a philips for the under seat frame that holds the seat in place
a flat head for staple removal
a hammer, to hammer staples in that didn't fully seat
1/4" staples
staple gun
needle nose and regular plyers-to pull staples
scissors-to cut fabric
tape measure
marking pencil
double sticky tape
ready set go!
remove your underseat frame, set aside. Then get your muscles out and start prying and pulling and removing the fabric cover. Hammer any staples that are too hard to pull out flat.
I cut my lid fabric approx 32" x 32". I good portion of this will be trimmed away, the extra fabric is great for stretching and pulling.
Start by stapling the corners down, I'd say I used about 3 in each corner.

Next along the sides creating tucks on each side of each corner-see photo to follow.
As you staple get everything pulled evenly around... your biggest test is to stretch and staple with only those two corner pleats and as little bulging as you can. Some bulging can be smoothed out just pressing and pushing the area later. It took me a lot of staples!

close up of corner tuck pleats

Once the fabric is fully stapled nice and flat set the underlid frame on your stapled work, measure the sides to centre as close as possible.
Trace around the inside of that frame.

(This next step may seem redundant, but with my amount of experience (or inexperience!) it was worth it. I needed that extra space and fabric for pulling and placing.)Next I restapled the whole thing, placing the staples as close to the traced line where the frame would. Then I removed all of the staples that fell outside of that line
...see photo below.
Then I trimmed all of the fabric along that line

TWEAK TIME! Let's multipurpose this cube!
I thought creating a wipeable surface for the 'snack and bevy' tray would be awesome.
This was my original choice of fabric...fun compliment.
-I covered a slightly larger area than the frame with iron on plastic covering You can also use clear mactac.
-then I traced out along the outside of the frame and trimmed the edges
-then double side sticky taped it in place on the bottom side of the frame, measured to centre on the bottom of the lid and screwed it in place.
LID DONE!

part 2
THE BOX
you will need a sewing machine for this part
you are covering right over the existing fabric!
The Box 'Band' upholstery covering.
I measured the ouside depth plus 3" and outside perimeter plus 1.5" of the box.
my measurement came to 11" x 68.5" so I cut 14" x 71"
*special note....I used the salvage edge for one of the 71" sides, to use that stable edge for the bottom of the box.
-wrap the fabric around the box, right side down and snugly pin with several pins.
-slip off and straight stitch along your pinned line
*next step is important

-press both edges over to one side then top stitch about a 1/4" from the straight stitch onto the rough edge from the wrong side. This top stitch is going to add security to the fabric around the box.
-trim the rough edge fabric

image of top stitch on right side

-Next mark one side of the 'box band' into quarters. (fold in half then half again.)
-Mark the inside of the box in the middle of each 'wall'. Here my halfway is 7.5"
Once all 4 'halfway's' are marked
-place the 'band' inside of the box, right side facing the inside fabric of the box
-line up your quarter marks to your halfway points and staple around an inch into the box.

-starting from your halfway mid point staple a straight line of staples to each corner.
You should end up with a gap as seen below. Get your staples as close to that corner as you can! That extra fabric is needed to wrap the outside of the corners.
*tip...I applied 'fray check' all along this edge to keep it from fraying in the future. I'm not sure if it's neccessary but I like knowing that that safeguard has been done.

sorry this is fuzzy but it's all I have!
-gently pull the unstapled edge of the 'band' from the bottom of the box up and over the lip of the box.

your extra corner fabric should create a mitre fold like this.

Finish with stapling the fabric under the box and re-attaching your feet.

Now enjoy your finished product!


Comments